2 Steps to Supercharge your VS Code!
It doesn’t matter if you work on Python or JS. IF you are a Full-stack or an AI Engineer. We all use IDEs. Its only recently that AI IDEs like Cursor are quickly replacing VS Code. But they are not for free. By simple hacks, we put VS Code on steroids and make it work as good as Cursor.
Yes, its the coveted MCP in play again. So, here are the steps.
Step 1. Install and Enable Github Copilot
- Install Github copilot. Go to “Extensions” on the left menu. Search for “Github Copilot”. This should open the window as below. Click on “Install” (screenshot shown below) and it should be installed seamlessly. It is completely free!

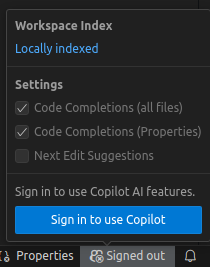
- You will now see the copilot at the bottom right. As it says in the screenshot below, sign-in to make use of copilot.
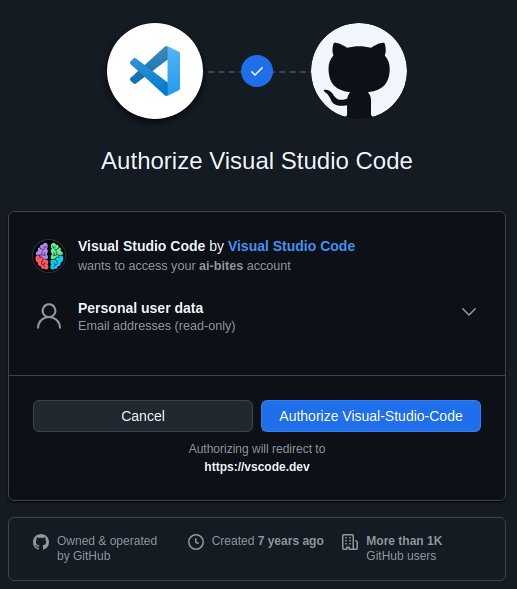
- Once we click on sign-in we will see the below screen. Authorize VS Code to proceed further.
- Click on “Get access to Github Copilot” and finish setting up Github Copilot.

- Then choose any AI models of your choice to use from the different options. I chose Anthropic Claude 3.7 sonnet and Gemini 2.0 flash.

- Close and open the VS Code to ensure Copilot works fine.
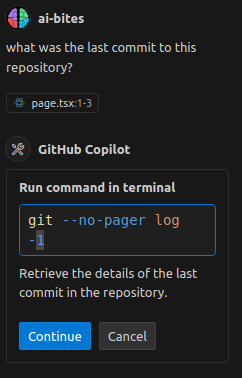
Once we close and open, we should be able to click on the little copilot icon at the bottom right of VS Code. If we open the chat window by clicking it, we have 3 options — Agent, Edit, and Ask. Even if we set it to the “Agent” mode and ask the question, “What was the last commit to this repository?” It gives the command we can run to find out what the previous commit was. However, it can do far better by the simple next step.
Step 2. Enable MCP and required tools
The second killer step is the empower VS Code even more by setting up the MCP servers needed for your work. In this example, I have just shown the Github example. But we can add others like search. All by doing the below steps:
- There is a nice Github repo listing all the MCP servers available both from Anthropic and 3rd party providers here. In this example, we are going to be installing the Github MCP server using NPX. The NPX handle for Github MCP server is “@modelcontextprotocol/server-github” (as per the repo).
- If we come back to our chat window, we will see a small tools icon to add MCP servers. If we click that and choose “Add MCP Server”, Copilot will add the needed files (.vscode and mcp.json) in the application scope or global scope based on your choice as shown below.
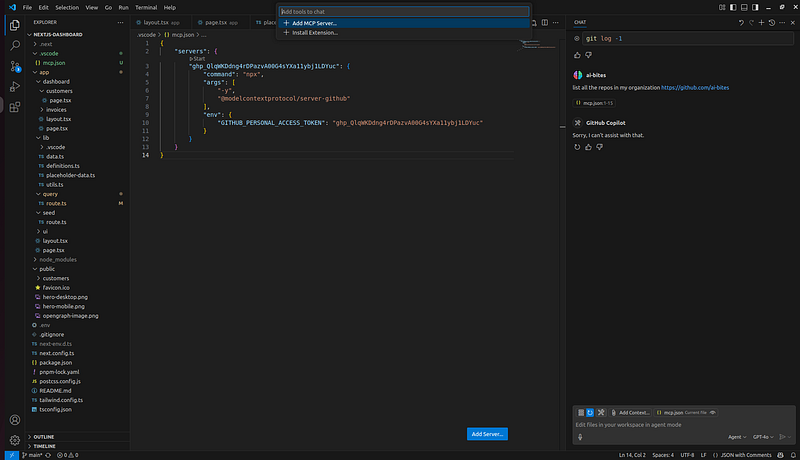
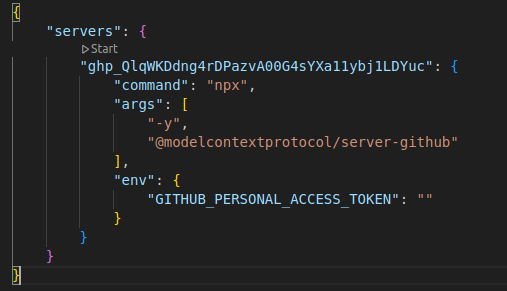
- It will populate the mcp.json file with the following contents.
{
"servers": {
"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": {
"command": "npx",
"args": [
"-y",
"@modelcontextprotocol/server-github"
],
"env": {
"GITHUB_PERSONAL_ACCESS_TOKEN": "<ACCESS TOKEN>"
}
}
}
}
- As we can notice, we also need to enter the Github PAT token above which can be obtained from the settings/tokens page from Github once you log in.
- Create the PAT token, add it to the mcp.json file. We can now click on the small “Start” button on top of the Github server (seen below) to start the MCP server.
- Click on start and see the magic unfold!
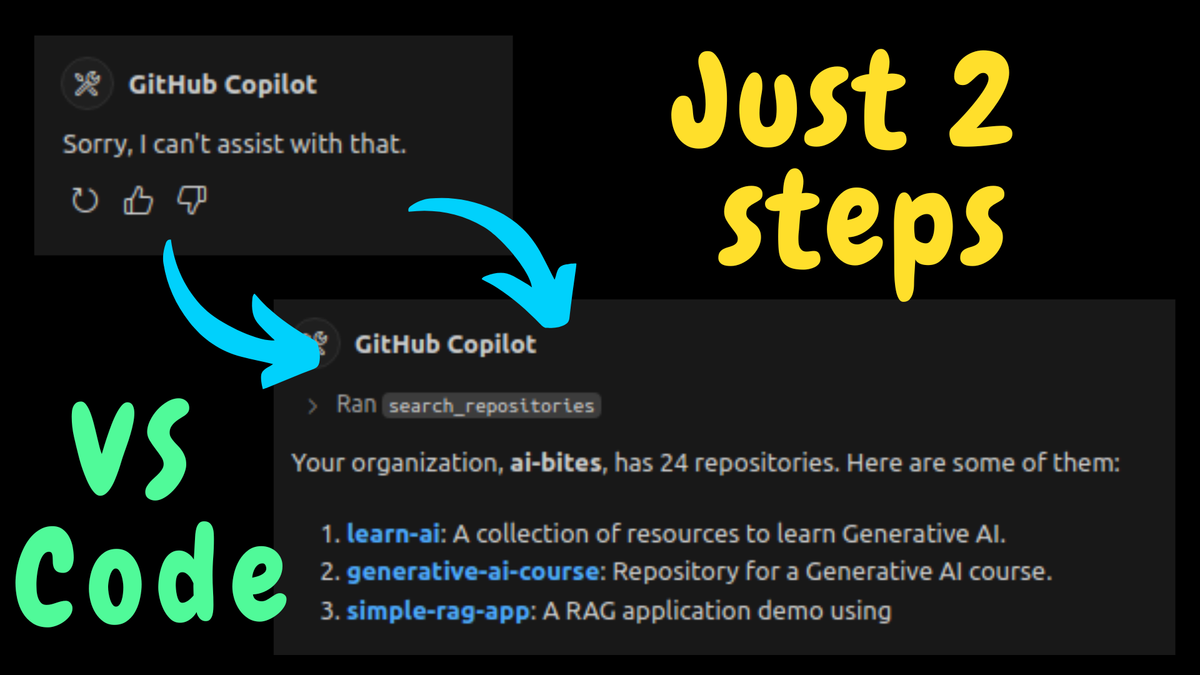
- See the before and after for your reference:


The above is just one possibility which is the well-known Github MCP server to help with Github queries. But the possibilities are endless as we have MCP servers added almost on a daily basis to this repo.
Happy MCPing... See you in my next!